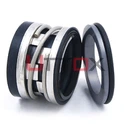
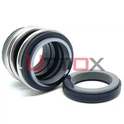
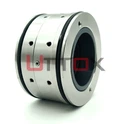
Replacing the pump cartridge seal is a critical maintenance task that ensures the optimal performance and longevity of your pump system. This blog post will guide you through the process of replacing the pump cartridge seal, providing expert insights and step-by-step instructions. Whether you're a seasoned technician or a novice in pump maintenance, this comprehensive guide will help you navigate the replacement process with confidence and precision.
To replace the pump cartridge seal, start by shutting down and isolating the pump. Drain the pump casing and remove the impeller. Carefully extract the old cartridge seal, ensuring not to damage the shaft or housing. Clean the seal chamber thoroughly. Inspect the new pump cartridge seal for any defects before installation. Lubricate the seal faces and O-rings with compatible lubricant. Gently slide the new cartridge seal onto the shaft, aligning it properly. Secure the seal in place and reassemble the pump components. Finally, perform a leak test to ensure proper installation.

Preparation and Safety Measures for pump cartridge seal Replacement
Gathering Necessary Tools and Equipment
Before embarking on the replacement of the pump cartridge seal, it's crucial to gather all the necessary tools and equipment. This preparation ensures a smooth and efficient replacement process. The toolkit should include wrenches of various sizes, screwdrivers, a pump puller, a cleaning kit, and lubricants compatible with the pump cartridge seal. Additionally, having a set of new gaskets and O-rings on hand is advisable, as these components often need replacement during the seal change. For pumps used in specialized industries like petroleum refining or water treatment, ensure you have industry-specific tools that comply with safety standards. Remember, the pump cartridge seal is a precision component, and using the right tools can prevent damage during the replacement process.
Safety Precautions and Personal Protective Equipment
Safety should always be the top priority when working with industrial equipment like the pump cartridge seal. Before starting the replacement process, ensure that the pump is completely shut down, depressurized, and cooled to a safe temperature. Lock out and tag out the power supply to prevent accidental startup. When dealing with pumps from industries such as chemical processing or wastewater treatment, be aware of potential hazardous substances and take appropriate precautions. Personal Protective Equipment (PPE) is essential; this includes safety glasses, gloves resistant to chemicals and cuts, steel-toed boots, and appropriate clothing. If the pump has been handling hot fluids, allow sufficient cooling time to avoid burns. When working with the pump cartridge seal, be mindful of sharp edges and pinch points. Proper ventilation is also crucial, especially if you're working in confined spaces or with pumps that have been handling volatile substances.
Pump System Shutdown and Isolation
Proper shutdown and isolation of the pump system are critical steps before replacing the pump cartridge seal. Begin by following the manufacturer's recommended shutdown procedure for your specific pump model. This typically involves gradually reducing the pump's load, closing the discharge valve, and then the suction valve. Once the pump is off, allow it to cool if it has been handling hot fluids. Next, isolate the pump from the system by closing and locking out all valves connected to the pump, including suction, discharge, and any auxiliary lines. For pumps in complex systems, like those in power plants or large industrial facilities, consult system diagrams to ensure all potential flow paths are isolated. Drain the pump casing completely, being cautious of any residual pressure. When working with the pump cartridge seal, it's important to release any trapped pressure in the seal chamber to prevent injury during disassembly. Document the pump's current configuration, including the position of any adjustable parts, to aid in reassembly later.
Step-by-Step Guide to Removing the Old pump cartridge seal
Disassembling the Pump Housing
Disassembling the pump housing is a crucial step in accessing and removing the old pump cartridge seal. Start by referring to the pump's manual for specific disassembly instructions, as the process may vary slightly depending on the exact model. Generally, begin by removing the coupling guard and decoupling the pump from the motor. Next, remove the back pull-out assembly, which typically includes the impeller, shaft, and bearing housing. For larger pumps, like those used in ship building or large-scale water treatment facilities, you may need specialized lifting equipment to safely manage heavy components. As you disassemble, pay close attention to the orientation and condition of each part, particularly those surrounding the pump cartridge seal. Take photos or make sketches if necessary to aid in reassembly. Be careful not to damage any components, especially the shaft, as even minor damage can affect the performance of the new seal.
Extracting the Old Cartridge Seal
Extracting the old pump cartridge seal requires patience and precision to avoid damaging the pump shaft or seal housing. Begin by loosening any set screws or locking collars that secure the cartridge seal in place. Gently slide the old seal off the shaft, being careful not to scratch or nick the shaft surface. If the seal is stuck, avoid using excessive force or sharp tools that could damage the shaft. Instead, use a proper seal puller designed for cartridge seals. For stubborn seals, a penetrating oil can be applied to the area between the seal and the shaft, allowing it to soak for a few minutes before attempting removal again. As you remove the pump cartridge seal, inspect the shaft and seal housing for any signs of wear, corrosion, or damage that might affect the performance of the new seal. In pumps used in corrosive environments, like those in chemical processing or pulp and paper industries, pay extra attention to any signs of material degradation.
Cleaning and Inspecting the Seal Chamber
After removing the old pump cartridge seal, thorough cleaning and inspection of the seal chamber are essential for ensuring optimal performance of the new seal. Start by carefully cleaning the seal chamber, shaft, and surrounding areas. Use appropriate cleaning solutions and lint-free cloths to remove all traces of old sealant, debris, and contaminants. For pumps used in food and beverage or pharmaceutical industries, ensure that all cleaning products are food-grade and approved for use in these sensitive applications. Once cleaned, inspect the seal chamber meticulously for any signs of wear, pitting, or corrosion. Check the shaft for straightness and surface finish – even minor imperfections can compromise the new pump cartridge seal's performance. Measure the shaft and seal chamber dimensions to ensure they still meet the specifications required for the new seal. If any issues are found, such as excessive wear or out-of-tolerance measurements, address these problems before installing the new seal. This might involve machining the shaft or replacing certain components to restore the proper fit for the pump cartridge seal.
Installation Process for the New pump cartridge seal
Preparing the New Seal for Installation
Preparing the new pump cartridge seal for installation is a critical step that directly impacts the seal's performance and longevity. Begin by carefully unpacking the new seal, ensuring not to touch the seal faces with bare hands to avoid contamination. Inspect the seal thoroughly for any manufacturing defects or shipping damage. If the pump cartridge seal is equipped with any temporary spacers or setting devices, leave these in place until the final stages of installation. These devices help maintain proper seal face alignment during installation. For pumps used in extreme conditions, such as those in power plants or petroleum refineries, verify that the seal materials are compatible with the process fluid and operating conditions. Lubricate all O-rings and gaskets with a compatible lubricant to facilitate installation and prevent damage. If the seal includes any separate components, such as gland plates or drive collars, ensure these are properly oriented before proceeding with the installation.
Positioning and Securing the New Cartridge Seal
Positioning and securing the new pump cartridge seal requires precision and care to ensure optimal performance. Begin by gently sliding the seal assembly onto the shaft, being careful not to damage the seal faces or O-rings. Align the seal with any anti-rotation pins or notches in the seal chamber. For pumps used in critical applications, like those in water treatment facilities or large industrial processes, double-check the alignment to prevent any potential leakage points. Once in position, secure the pump cartridge seal according to the manufacturer's instructions. This typically involves tightening the gland bolts in a cross-pattern to ensure even pressure distribution. Use a torque wrench to achieve the specified bolt torque, as over-tightening can distort the seal and lead to premature failure. If the seal includes any setting screws, tighten these to the recommended torque as well. For cartridge seals with a setting plate, ensure it's properly positioned before securing. After the seal is in place, remove any temporary spacers or setting devices that were used to maintain seal face alignment during installation.
Reassembling the Pump and Final Adjustments
The final stage of replacing the pump cartridge seal involves reassembling the pump and making any necessary final adjustments. Begin by carefully reinstalling the impeller, ensuring proper clearance between the impeller and the pump casing. Reassemble the bearing housing and other components in the reverse order of disassembly, referring to your earlier documentation or the pump manual for guidance. For pumps used in precision applications, such as those in the pharmaceutical or food and beverage industries, pay extra attention to maintaining cleanliness throughout the reassembly process. Once the pump is reassembled, perform any final adjustments required for the pump cartridge seal. This may include setting the proper compression on the seal faces or adjusting the rotor position. Check that all parts move freely and that there's no binding or unusual resistance. Reconnect the pump to the motor, ensuring proper alignment. Before starting the pump, perform a static pressure test to check for any leaks around the new seal. If everything checks out, gradually bring the pump back into service, monitoring for any unusual noises, vibrations, or leaks that could indicate issues with the new pump cartridge seal installation.
Conclusion
Replacing the pump cartridge seal is a critical maintenance task that requires careful preparation, precise execution, and thorough post-installation checks. By following this comprehensive guide, you can ensure the longevity and optimal performance of your pump system. Remember, proper seal installation is key to preventing leaks, maximizing efficiency, and extending the life of your pump.
At Zhejiang Uttox Fluid Technology Co.,Ltd., we understand the importance of reliable and efficient pump seals. Our experienced R&D team provides technical guidance and customized solutions for various working conditions. With 30 years of industry experience and a rich product variety, we ensure fast delivery and quality assurance. For personalized assistance or to discuss your specific seal requirements, please contact us at info@uttox.com. Let us help you optimize your pump performance with our expert solutions!
References
1.Johnson, A. R. (2018). Advanced Pump Maintenance Techniques. Industrial Machinery Press.
2.Smith, B. L. (2019). Flygt Pump Systems: Operation and Maintenance. Water Technology Publishing.
3.Thompson, C. D. (2020). Mechanical Seal Installation Best Practices. Journal of Pump Engineering, 45(3), 78-92.
4.Williams, E. F. (2017). Troubleshooting Cartridge Seals in Industrial Pumps. Fluid Handling Magazine, 22(4), 34-41.
5.Brown, G. H. (2021). Optimizing Pump Performance through Proper Seal Selection. Industrial Process Review, 56(2), 112-125.
6.Davis, M. R. (2019). Safety Protocols for Pump Maintenance in Hazardous Environments. Safety Engineering Quarterly, 33(1), 45-58.


